

We design and support a lot of deployments on a wide variety of platforms. Our clients are dispersed across Linode, Vultr, Digital Ocean, OVH, and AWS, which are all great platforms in their own right. They all have their different pros and cons; however, one thing they all share is automation built by fallible humans with good intentions. Hopefully, you won’t be on the receiving end of those automated erroneous decisions, but what if you are? Enter Cloud Contingency When The Ban Hammer Drops.
This article is inspired by the recent lockout of Raisup, an AI startup based in France.
How @DigitalOcean just killed our company @raisupcom. A long thread for a very sad story. pic.twitter.com/uOFCDRoYJ6
— Nicolas Beauvais (@w3Nicolas) May 31, 2019
The long story short is that some bad logic in some of Digital Ocean’s anti-abuse automation triggered and took Raisup’s entire infrastructure offline. Adding to the crisis, the Digital Ocean support/review process failed miserably, and Raisup had to resort to twitter for resolution after ~30 hours of downtime.
Unfortunately, we’ve had to deal with this exact scenario, and many along the same lines for several of our clients as well. Never with Digital Ocean, but definitely with other providers mentioned above. The point is, your entire company is one arbitrary decision away from being locked out of your resources with lengthy resolution time and possibly no resolution – if Raisup didn’t have 5000 followers on Twitter and the power of social media, the resolution could have taken significantly longer.
So what’s the solution here? Always have your data backed up with a third-party vendor, also known as, an off-site backup. Every cloud or VPS provider has some backup option. It’s easy to think that your data is safe because their automated backup service has copies of your data. This doesn’t consider the fact that they could have a colossal failure rendering your backups unusable, or in this case, an account lockout making them completely inaccessible. At one point, Nicolas tweets: “Please, @digitalocean, @markbtempleton, @barryjcooks, @benuretsky, @moiseyuretsky give us at least access to our backups to save our company.”
When you’re a small organization, it can be challenging to consider all of the liabilities on the system side while also creating your product/service at breakneck speeds. You perform your due diligence and take your providers at their word that they’ll hold up their end of the bargain. Despite their best efforts, sometimes an unfortunate series of events leads to them not doing so.
At Revenni, we make use of restic. Restic is an opensource incremental/dedup backup solution that is simple to set up, encrypts your backups, and can store them on a myriad of storage backends including most major cloud providers. We store tens of terabytes of encrypted backups on Backblaze B2. Backblaze has been around for over a decade providing backup solutions to consumers and businesses alike. In 2015, they released Backblaze B2, an object storage platform at a fraction of the cost of compatible alternatives ($0.005/GB/mth or $5.00/TB/mth) .
We’re going to show you how you too can have offsite backups providing business continuity should you find yourself on the receiving end (deservedly or not!) of a ban hammer or complete destruction of your cloud providers working dataset and backups.
1. OBTAIN A BACKBLAZE B2 ACCOUNT
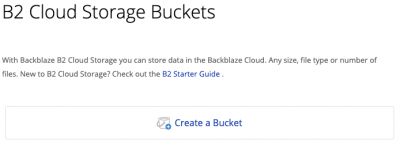
Head over to B2’s signup page and create an account. Once logged in, you’ll see a giant “Create a Bucket” button. Click it.
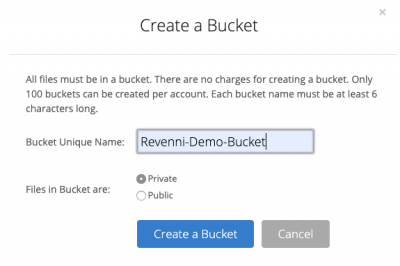
2. CREATE YOUR FIRST BUCKET
You’ll have to specify a globally unique name for your bucket, so we recommend prefixing the bucket name with either your company name or other unique string.
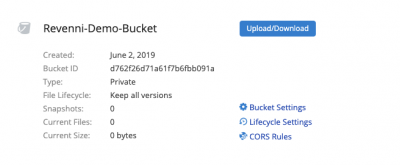
Once you click “Create a Bucket”, you’ll see the bucket listed on the Buckets page.
3. CREATE A BUCKET SPECIFIC APP KEY
Now that we have a bucket created, we need to create a bucket specific App Key. This key pair will allow restic to access this individual bucket and none of the others in your account.
Click App Keys on the left menu and on the resulting page click the “Add a New Application Key”.

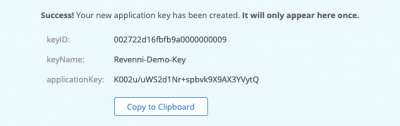
On the resulting dialog, we specify a key name and restrict the key to the “Revenni-Demo-Bucket”.
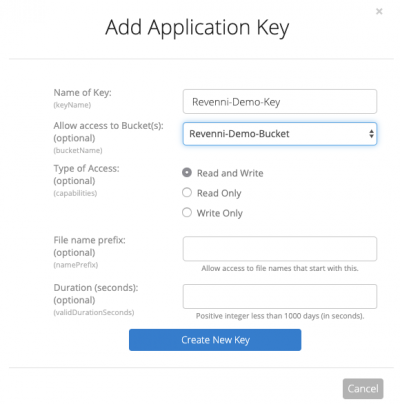
Click Create New Key.
You will be shown the keyID, keyName, and applicationKey. Record these, they will not be shown again. Don’t post them on the internet as we did below, this bucket no longer exists.
4. INSTALL RESTIC
Restic packages in official repositories lag behind their development cycle. We recommend installing restic via their Official Release Binaries. Download the correct file for your operating system, most of you will download restic_0.9.5_linux_amd64.bz2, and if not, you’ll likely know which to download.
5. CREATE RESTIC KEY & SCRIPT
Restic needs a very small amount of configuration. We create a restic directory, and restic encryption key. The restic.key file contains the passphrase used to encrypt data before storing it at B2. Without this key, your backups cannot be restored on another server.
All of these commands are run as root.
Create /restic/restic.env with the following content. This file contains the repository location and credentials to access it.
The RESTIC_REPOSITORY is a string comprised of “b2:<bucketName>:<hostName>”. We use the hostname as the repository name.
Create /restic/restic.sh. This file sources the configuration in /restic/restic.env at runtime in order to store data in our B2 bucket.
Set restrictive permissions on /restic and it’s contents.
6. INITIALIZE THE RESTIC REPOSITORY
Restic needs to initialize the repository on the B2 Bucket. We stored our bucket configuration in /restic/restic.env. Any time you run restic commands directly your must first source this file so that restic knows where our repository is and what keys are required to access it.
7. RUN YOUR FIRST BACKUP
Everything is in place for us to take our first snapshot of the system.
8. SCHEDULING AUTOMATIC BACKUPS
Now that restic can backup our system when invoked with /restic/restic.sh, we should add a cron so that it runs every day at midnight and mails the results to the address specified in the MAILTO variable. Create /etc/cron.d/restic with the contents below.
8. GENERATE ARCHIVE FOR RESTORE
Now that we have restic snapshotting our system every night at midnight, we’ve checked off the offsite backup box.
Let’s create an archive so we can just extract it on a new machine and start the restore process.
Save this archive in a safe place. It’s not critical so long as you have the B2 keys and the Restic encryption key, but it will save you a lot of time setting up restic again.
9. SETUP RECOVERY MACHINE
So what happens if we cannot access our resources (servers and backups) from one provider?
We provision servers at our new provider and install restic on it (same process as step 4).
Copy the restic.tar.gz archive we generated to the new server and extract it. You’ll want to be in / when you do it.
9. START RECOVERY PROCESS
Restic allows us to mount our B2 Bucket using fuse. We can use this option to selectively copy data from our snapshots into the proper places on the system. You’ll need two terminals or a screen session.
In a second terminal you can now navigate the snapshots via standard linux commands.
Alternatively, you can copy data from the snapshot non interactively by running something like the following. A note about this method is that the path listed is “/” because we initially backed the system with / as the path.
The directory we’re restoring is specified by the –include directive, in this case, /important-data.
For more examples, see the restic restore documentation.
That’s it, restic in a nutshell for the masses.
Feel free to contact us if you have any challenges with setting up restic. We won’t even try to sell you something, we just want everyone to have options in the scenario that inspired this post. If you’re interested in our Ansible playbook we can post that too, this article is written so that functional backups can be had by all regardless of skillset.